What is SSH?
SSH stands for Secure Shell. It's a cryptographic network protocol that provides a secure way to access and manage remote servers and devices over an unsecured network. SSH allows users to securely log in to a remote system, execute commands, transfer files, and perform other network services.
In this post we will see how to use cloud shell to generate SSH Key Pairs (Private & Public Key) & SSH to Linux VM in OCI. Below are the steps:
- Login to OCI Console and navigate to the Compute -> Instances
- Click on Create Instance button
- Provide the name for your Instance and then scroll down
- In Add SSH keys section, we need to upload the SSH keys. And these keys we will be generating from our Cloud Shell
- Open OCI Cloud Console home page in new window and launch Cloud Shell
- It will start creating a new VM for use in cloud shell
- You will be then logged in to the VM and will be presented with VM Shell
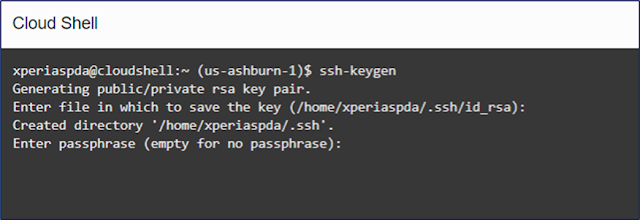
ssh-keygen
- If you want you can provide the name of the private key file or keep the default one which id_rsa in root directory which is (/home/<username>).
- Here we will be keeping the default one (id_rsa) and will press Enter to continue
- If you want you can provide the passphrase for your key. We will be generating the key without passphrase so will press Enter
- Press enter again
- Key pair will be generated now
- So, these key pairs will be generated at root location in folder .ssh
- Now let's download these key files. Click Cloud Shell menu and select Download option
- Download File dialog will appear and in that we have to enter the location relative to the root directory (~/). So, we will enter .ssh/id_rsa and then click Download button which will download the file
- Similarly, we will download the public key by entering .ssh/id_rsa.pub
- This will be the content of both the keys
- Now, use the content of id_rsa.pub key file and paste in compute screen in Add SSH key section and the click Create button
- Instance will start provisioning
- Now, go back to cloud shell and enter the below command to connect to the VM. Here opc is the username for the VM user which is also visible in Instance Screen in above screenshot.
ssh opc@150.136.169.176
- Enter yes to connect to the VM


Comments
Post a Comment